Monday, 30 May 2016

Chocolate Cake

                       Hi to all... Friends do you all love cakes? I love them a lot and we all too. But we do not show much interest in making them because of absence of oven at home. Now, I am going to know you how to make a cake which does not need an oven. This cake is easily made in a pressure cooker. Here I am not using eggs so that vegetarians you can make this recipe and enjoy it.
                   
                      So, let's see how to make a delicious chocolate cooker cake.


Ingredients:

  • Plain flour - 1 cup
  • Powdered sugar - 1 cup
  • Coco powder - 2 table spoons
  • Baking powder - 1/2 tea spoon
  •  Melted Butter - 50 ml
  • Milk - 100 ml
  • Curd - 60 ml
  • Salt / sand - 1 cup
  • Ghee / butter for greasing
  • Baking soda - 1/4th spoon


Process:

STEP 1:

                      Firstly, we need to pre heat the cooker like we pre heat the oven. For this take a heavy bottomed cooker and put sand or salt in to the cooker and place a ring so that the tin sits properly that is straight. Now, take the lid and make sure that you put the rubber ring which is the black ring in the pressure cooker, cover it and do not put the valve (whistle). Because, this has no liquid and it does not contain any water. So, please do not put the valve. Now turn on the flame and let the cooker heat up for 10 minutes.

STEP 2:

                 While the cooker is heating, We will quickly make the batter. For making the batter, take a large bowl and sift the dry ingredients first. Add plain flour, powdered sugar, coco powder and the baking powder  and just sift all of them properly. We can also add roasted dry fruits for making our recipe more healthy and more tasty.

STEP 3:
           
               To this add wet ingredients such as melted butter, milk, curd and just blend them to make a fine batter. And hence our batter is ready.

STEP 4:

              Take a tin and grease it with either butter or ghee and add the batter to this tin and shake the tin well to make the  batter evenly. Now this tin is ready to place in the cooker. Now, very carefully open the pressure cooker and place the tin and then cover it and make the cake to bake for 25 minutes.

STEP 5:

              After the completion of 25 minutes just check out the cake. Take a knife and just poke it in the center of the cake and if it comes out absolutely dry, then the cake is done! And un mold the cake just run the knife through the tin on the sides. And garnish it with chocolate. Let it cool down for an hour so that we can really have wonderful taste as equal to the outside bakeries.

                              Our yummy yummy chocolate cake is ready to eat... 

Mango Milk Shake

                 Hieee My dear friends... Today I want to introduce tasty and cool cool Milk shake which everyone likes the most. All of us like Mangoes, As they are the seasonal fruits and are liked by every one without any difference in age. This Milk shake can also be prepared when mangoes are out of season. Instead of using fresh mangoes, we can also use canned mango pulp. I really love this milk shake among all the milk shakes that are available. I am sure that you too like it. No no you just love it !!! Soo..., Let's start our milk shake which can be served at any time......

Ingredients:

  • Mangoes - 2 finely chopped
  • Sugar - 2 spoons
  • Milk - 1/2 cup
  • Ice cubes - 3
  • Egg shade Food color - 1/4 spoon
  • Ice cream - 1 scoop
Process:

STEP 1:

                   Take 2 mangoes and peel them off and then cut them in to small pieces and add them to a jar. Along the mango pieces, add 2-3 ice cubes and also sugar to it.

STEP 2:
     
               Take a hand blender or if not available we can have a mixer. By using the blender or a mixer make the pieces in to fine pulp. You can use canned mango pulp when fresh mangoes are not available i.e when mangoes are out of season.

STEP 3:

                Usually, fresh mangoes do not give enough color and hence in restaurants they add artificial color to it. This step is optional we can add or we cannot. Add little bit of egg shade yellow color. To this add milk and blend it. So that our Mango milk shake is ready...

                           Lastly, after taking in to glass garnish it with a scoop of ice cream which tastes really awesome...!!!


Sunday, 29 May 2016

Stuffed Idli


                         Hello! Good morning Internet.. Welcome all.. Good morning?? How come we say Good morning on internet?? Well that's simple... Now I am posting a recipe related to make your morning really good and tasteful with a delicious 😋 breakfast that you would love to have every morning.. Bored of eating normal idly?? Want to make regular foods become more tasteful?? Follow me... Today I'm going to share how to turn a normal idly into a completely tasty breakfast.. We call this 'Stuffed idli'. Well, Let's get into action!                
           
Ingredients:

  • Idli batter - As needed
  • Large Potato - 1 boiled, peeled and mashed
  • Oil - 1 table spoon
  • Mustard Seeds - 1 table spoon
  •  Urad Dal - 1 table spoon
  • Onion - 1 finely chopped 
  • Tomatoes - 2 finely chopped
  • Capsicum - 1 finely chopped
  • Red Chili powder - 1 table spoon
  • Turmeric powder - 1/4 table spoon
  • Water - 1/3 of cup
  • Coriander leaves - 2 spoons finely chopped
  • Salt - as required


Process that should be done:

STEP 1:

                The first step is to take a kadai and heat it by placing on stove and then add Oil to it and when it is hot enough, temper with Mustard seeds and Urad dal. Fry them for 2 minutes. Later add finely chopped onions and tomatoes, fry till transparent.   

STEP 2:

              To this, add finely chopped Capsicum and fry it for a minute in medium flame. Now, add red chili powder, salt as needed to your taste and also add turmeric powder and fry them until the complete veggies gets cooked. And then after to this add mashed potato and blend well for a minute in a medium flame.

STEP 3:

            Add 1/3 cup of water and cover the cooking pan with a lid until all vegetables gets cooked in a low flame. Sprinkle little amount of water if it is too dry and mix well. Finally add finely chopped Coriander leaves to it.
                 So, with this our stuffing is completed. Now lets get in to the next step of making Idli.

STEP 4:

           Take an Idli plate and grease it with Oil. Now pour idli batter 3/4th of mold and then stuff the masala that we have prepared nothing but vegetable stuffing and now cover the top i.e;  remaining portion of the mold with idli batter.

STEP 5:

            Then steam the idly for 10-15 minutes or till it is done.

                           Now, Stuffed Idli is ready to serve.We can have them directly or with chutney or sambhar too.....

Saturday, 28 May 2016

Vermicelli (Semya) Pulihora


            Today, I am going to share a special and a very tasty recipe with all of you beautiful woman in the world.... Don't worry.. Guys as well.. :)    Everyone knows about lemon rice.. Don't you?? Well I presume you do.. If you don't, then check my blog for that recipe.. Today I'm going to share almost a similar dish to lemon rice.. We use vermicelli here for rice instead.. We can have it for our breakfast and can also be taken as a snack... This is liked by the children a lot.. Blah.. Blah.. Blah.. All that stuff gets common though.. Well.. Let's get started!


Ingredients:

  • Vermicelli (Semya) - 2 cups
  • Lime (Lemon Juice) - 5 spoons
  • Pea Nuts - 2 spoons
  • Urad Dal - 1 spoon
  • Cumin Seeds - 1/4 spoon
  • Mustard Seeds - 1/2 spoon
  • Chana Dal - 2 spoons
  • Oil - 4 spoons
  • Green Chilies - 4
  • Dried Red Chilies - 2
  • Water - 2 cups
  • Salt - To taste
  • Turmeric Powder - 1/4 spoon
  • Hing - 2 pinches
  • Curry leaves - 3 leaf lets
  • Coriander leaves -  3 spoons finely chopped
  • Cashew nuts - 10
  • Ghee - 2 spoons
Preparation process: 
STEP 1:
           
                 The first and fore most step is we should boil the Vermicelli nothing but Semya  which is commonly called in our  local language. For this, Place a bowl on stove and add some quantity of water in order to boil the Vermicelli. There is no particular ratio of water that should be added. When the Vermicelli get boiled we can drain out the remaining water. So that when the water is about to boil add Turmeric powder. And then ad Vermicelli and mix it. Look after Vermicelli carefully because there is a chance of much boiling and it results in mashing of Vermicelli then it does not attract our eyes to eat it!

STEP 2:
       
            After completion of boiling drain out the remaining water and separate Vermicelli from it and place it in a plate and let it to be cooled. In this time we should prepare tampering.

STEP 3:

            For the purpose of tampering, take a kadai or a cooking pan and add  Oil to it and when the oil is enough hot, add Pea nuts and fry them until they turns in to golden brown color. Then separate them from that pan and then in the same pan, add Chana Dal, Urad Dal, Mustard Seeds, Cumin Seeds and pieces of dried red chilies and then add slices of green chilies and add Curry leaves. Finally add 2 pinches of Hing  and our tampering is also ready.

STEP 4:

               Now add this tampering and fried Pea nuts to our boiled Vermicelli and then add salt to taste and later add Lime enough to the Vermicelli and according to your taste and mix it gently. Finally garnish our Vermicelli pulihora  with finely chopped Coriander which gives very nice aroma to our recipe. Dish it out and serve it.
           
STEP 5:

                 This step can be considered as optional. We can ad fried cashew nuts at last as garnishing. For this take a pan and add 2 spoons of ghee and add cashew nuts and fry them to golden brown color and add to pulihora. 

Friday, 27 May 2016

Vermicelli Halwa (kesari)

          You may have attended several Functions or Festivals as well at your home and with your family and friends. What do you wait for? Thinking about?? While you sit at lunch.. Ummm.. Well, I definitely start thinking about Sweet that is to be served in my plate.. I just go on thinking what it would be..  This is because I love to eat sweets. Many of us does.. Among them, I always look forward for this item which I like the most... "Vermicelli Halwa" or  Kesari (Used in  our local language). I just ask them to serve me more if this dish is available.. If you didn't taste it yet, Give it a try. I bet you Enjoy!
Ingredients:

  • Vermicelli - 1 cup
  • Sugar - 1/2 cup
  • Water - 1 1/2 cup
  • Orange Food color - 2 pinches
  • Cashews - 10
  • Cardamom ( Elachi) powder - 1/4 table spoon
  • Ghee - 4 table spoons


Procedure:


STEP 1:
           
                Firstly, take a pan and add 2 spoons of ghee and when the ghee melts, add cashews and fry in a low flame until they become golden brown in color. When the color change occurs then take the nuts from the pan to a bowl and keep aside.

STEP 2:
           
             In this step add 2 more spoons of ghee to the same pan and add vermicelli to this and fry it until the vermicelli turns to golden brown in color. The vermicelli should be fried under a low flame and should be mix continuously. If we do not mix in the continuous manner, here is a chance of spoiling it and we may loose the exact taste. 

STEP 3:
             
              After completion of frying vermicelli to the desired color place that vermicelli in to another bowl. Now add water to it and bring it boil. While boiling, add 2 pinches  of  orange food color and then add vermicelli to this boiling water and allow it to cook by mixing it well.

STEP 4:
           
              When vermicelli gets boiled then add sugar to it and put it on low flame until the sugar melts. After this, before the time to dish out add cardamom powder and after taking in to a bowl garnish it with the roasted cashews.
             

Potato fry recipe

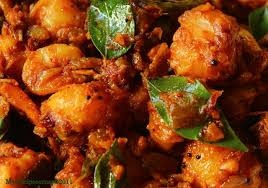
            Today I give you my favorite tuber.... Here are some  reasons why I Love Potatoes. Potatoes are versatile food. They can be used in many ways. They can be baked, fried, mashed, boiled etc..., They can be served hot or cold. In fact, they are cheap too. I really love items that are prepared by Potatoes like French fries, Korma curry, fry etc.., Now,  My dear friends I would like to introduce fry item made by potatoes. I am sure that all of you really enjoy this recipe.  So.. Come we can know the ingredients and the process that is involved in preparation of this recipe.


Ingredients:

  • Potatoes - 4 chopped in to small pieces 
  • Onions -1 Finely chopped
  • Cloves - 6
  • Cumin seeds - 1 1/4table spoon
  • Cinnamon - 1 inch
  • Coriander seeds - 1 table spoon
  • Turmeric powder - 1/4 table spoon
  • Oil - 5 table spoons
  • Salt - 1 or 2 spoons
  • Chili powder - 1/4 table spoon
  • Mustard seeds - 1/4 table spoon
  • Coriander - 3 spoons finely chopped
  • Curry leaves - 2 leaf lets

Procedure:


  STEP 1:
              To make this fry, The first and fore most step is to prepare the masala that we are going to add in the final step of this fry. To make this, take a frying pan and add cloves, cumin seeds, cinnamon and coriander seeds and fry them without adding oil. After 2 minutes we can observe the color change in the spices and the put off the stove and blend them in to fine powder.

STEP 2:
               Take a frying pan and put it on stove. Now add 5 table spoons of Oil and when it is hot enough add mustard seeds and 1/4 spoon of cumin seeds and then add finely chopped onion and fry them till they become golden brown. During this process add turmeric powder  and curry leaves to it.

STEP 3:
                 Now it is the time to add potato pieces . Drain the water present in them  and add the potatoes in it and make the to fry by mixing them in between. Later, add the masala that we have prepared in the first step to it and add salt to the taste, and add little amount of chili powder. Be careful that we have added masala so that the quantity of chili powder will be much less. Add masala according to your own taste. and the put the stove off.

STEP 4:
             Finally, garnish with fresh finely chopped coriander and the it is ready to serve.
                           
              Mouth watering, delicious, easy and simple fry is ready to eat.


Wednesday, 25 May 2016

Pudina rice

                    I love dishes made of  Rice. Dishes like Lemon rice, Pulav etc are my Favorite. Among them, I also have another Delicious and Healthy dish to share with you. It is called 'Mint rice' and generally called as Pudina rice. It is loved by everyone. It just attracts each and everyone to eat it. There is no doubt that children just love it a lot and will always ask for it once if they have it. Since this dish also helps to get a better health, there are no worries to provide this dish to friends and family in their daily diet. So, Let's just get Started! 


Ingredients:
  • Basmati rice - 2 cups
  • Mint leaves - 1 cup 
  • Green chilies -  4
  • Ginger - 1/2 inch
  • Garlic cloves - 3
  • Cinnamon stick -  2 inches
  • Cardamons - 7
  • Cloves - 6
  • Bay leaf - 1
  • Star Anise - 1
  • Cumin seeds - 1/4 table spoon
  • Fresh Coconut pieces (small size) - 5 or 6  
  • Oil - 4 table spoons
  • Onion - 1
  • Yogurt - 2 spoons
  • Water - 3 1/4 cups 
  • Salt - 1 or 2 spoons
  • Ghee - 1/ 2 table spoons
  • Cashews - for garnishing


Procedure:

STEP 1:
                 Firstly soak basmati  rice of 2 cups for 30 minutes. Now, to prepare mint paste... Put 1 cup of fresh mint leaves in blender.. To this add  2 green chilies,  1/2 inch ginger, 3 garlic cloves, 1 inch cinnamon stick, 5 cardamons, 4 cloves, 1/4 table spoon of cumin seeds, coconut pieces and make them in to a fine paste if necessary you can add little amount of water to this.

STEP 2:
                 Now, take a cooking pan and to this add 4 table spoons of oil when it is hot enough add whole spices, One bay leaf and stir it. To this add a thinly sliced onion and 2 sliced green chilies saute until they become soft. When the onion slices are turned to golden brown then add mint paste to it and mix it well.

STEP 3:
                    Add 2 table spoons of yogurt to the paste. After the addition of  yogurt stir it well. This step can be taken as optional. 

STEP 4:
                To this  add 3 1/4 cups of water and also add salt to taste, now add 1/2 table spoons of ghee. By adding ghee it improves the taste of our rice.  Bring it to a boil then add soaked basmati rice and mix it once.

STEP 5:
              Finally, cover the pan with a lid and cook on a low flame and lastly turn off the heat. Garnish it with roasted cashews.
       
                Our Mint rice which is usually called as Pudina rice is ready to serve. It can be served hot and tastes the best when it is hot. It also tastes good for lunch box for your children and they enjoy it.